On one hand, I love my Windows setup. It’s where my games are, where my Adobe apps live, and where I feel comfortable. On the other hand, every tutorial I watched for backend web development seemed to scream: “You need Linux.”
I wanted to learn Django, the powerful Python framework, but setting it up natively on Windows felt like swimming upstream.
Then I found the bridge: WSL (Windows Subsystem for Linux).
Step 1: Opening the Portal (Installing WSL)
If you haven’t used WSL yet, it feels a bit like magic. It allows you to run a full Linux terminal directly inside Windows. No rebooting, no lag.
I remember opening PowerShell and typing the command that started it all:
wsl –install
My first project wasn’t anything fancy—just a simple blog backend—but the setup taught me more than the code did.
One of the first hurdles was realizing that Ubuntu comes with Python, but usually not the pip (package installer) setup you need immediately. I learned the hard way that you should never mess with the system Python.
I learned the golden rule of Python development: Always use a Virtual Environment.
Bash
# Installing the tools
sudo apt update
sudo apt install python3-pip python3-venv
# Creating my project sanctuary
python3 -m venv my_first_project_env
source my_first_project_env/bin/activate
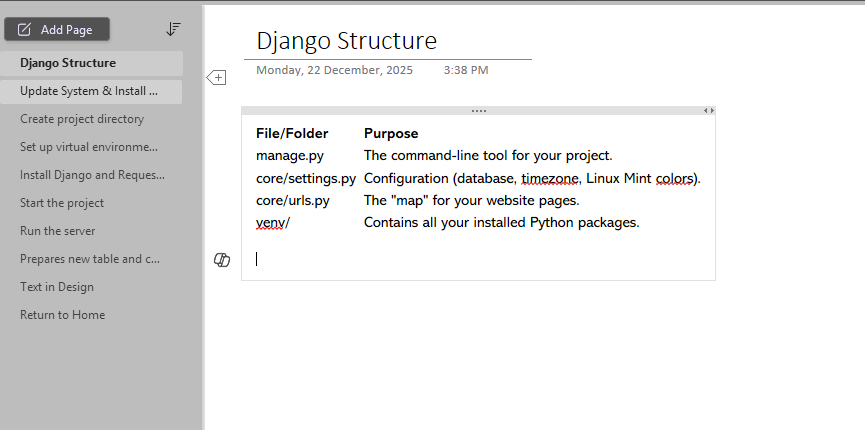
Below screenshot is how i keep my notes for reference
Installing the tools
sudo apt update
sudo apt install python3-pip python3-venv
Creating my project sanctuary
python3 -m venv my_first_project_env
source my_first_project_env/bin/activate
Seeing that little (my_first_project_env) appear next to my cursor was a small victory. It meant I had a sandbox. I couldn’t break my computer even if I tried.
Step 3: Summoning Django
With the environment active, installing Django was a breeze.
Bash
pip install djangoThen came the moment of truth. I navigated to my project folder and ran the command to start the project. This is where WSL shines—the file system integration. I could code in VS Code on Windows, while the code actually ran inside the Ubuntu terminal.
I typed:
Bash
django-admin startproject myblog
cd myblog
python3 manage.py runserver
I switched to my browser (Chrome on Windows) and typed in localhost:8000.
The “It Worked!” Moment
If you’ve ever learned Django, you know the screen. The little rocket ship. The text saying “The install worked successfully! Congratulations!”
A Side Note: The “One Click Settle” Envy (Laravel Herd)
While I am proud of learning the command line, I have to admit—sometimes I look at the PHP world with a bit of jealousy.
After finishing my Django setup, I discovered Laravel Herd. If you are into the PHP/Laravel ecosystem, you don’t even need to touch the terminal to get started. It’s basically a “one click settle” solution. You install it, and boom—you have a fast, native development environment ready to go. No sudo apt update, no configuring ports, just instant coding.
It made me realize how diverse the dev world is.
- WSL is for when you want to understand the engine, get your hands dirty with Linux, and have full control over your Python/Django environment.
- Laravel Herd is for when you just want to drive the car without opening the hood.
Both are valid, but for my Python journey, taking the “scenic route” with WSL gave me confidence that a one-click installer never could.
Leave a Reply